Believe it or not, you still have time to make this year a Handcrafted Christmas!
One of the easiest projects to make start with either Panel squares or Border Stripe prints. Here's a simple way to use both. The fabric line that I am featuring is called Holly Jollies by Victoria Hutto for Quilting Treasures, but just about any squares and stripe will work. (Click on the photo to order the Panel)
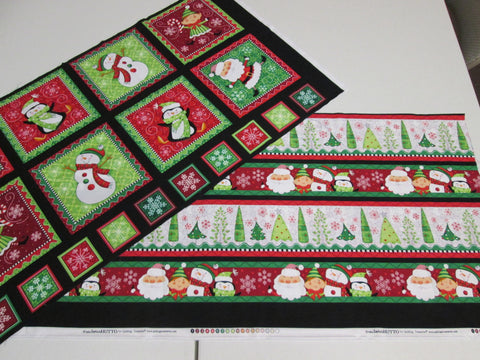
Start by cutting apart the Panel Squares into rows. If your Panel squares are turned the other way (the rows would be up and down) then simply cut them into separate squares and sew them back together into a row going across.

Since my Panel squares measure 44" across, I used 1-1/3 yards of the Border Stripe. That way I had more flexibility of centering the design. Cut the Border Stripe into rows. Your rows can be wherever you choose but I used one row of trees and one row of Santa & friends together (about 10").

Add other fabric strips to separate the rows. I cut the white 2" wide and the red are 4" wide. 
Lay out the rows to see if it's going to be long enough, either do the actual math or just measure it at this point and subtract 1/2" for every seam. Sew the rows together and press the seams to one direction. If you happened to figure the length too short you can simply add more of the white or red fabrics at the top or bottom; it will look like you planned it that way!

Now you just have to trim the edges to square it up. If you want, you can draw it with chalk first before you do the cutting.

I used the leftover Border Stripe fabric for part of my backing.

Simple quilting and a binding and I'll be all done!

With Christmas over 2 weeks away still, there's plenty of time to whip this out! Stay tuned for Part 2, it will feature ideas that only take a few hours--in case you're like me and work best under pressure!
Bye for now,
Teresa